
Access Levels
You can adjust ring groups when logged in as an End User or Super User. If logged in as End User, you must login using the Primary Inbound account and password.
Ring Groups
Super Users have access to all Ring Groups on the one page, whereas an End User has the same interface but can only adjust groups for a single subscription.
- Click on Call Routing across the top menu (Super User only)
- Click on Ring Groups on the left menu
- You will see all ring groups for Primary Inbound subscriptions on your account
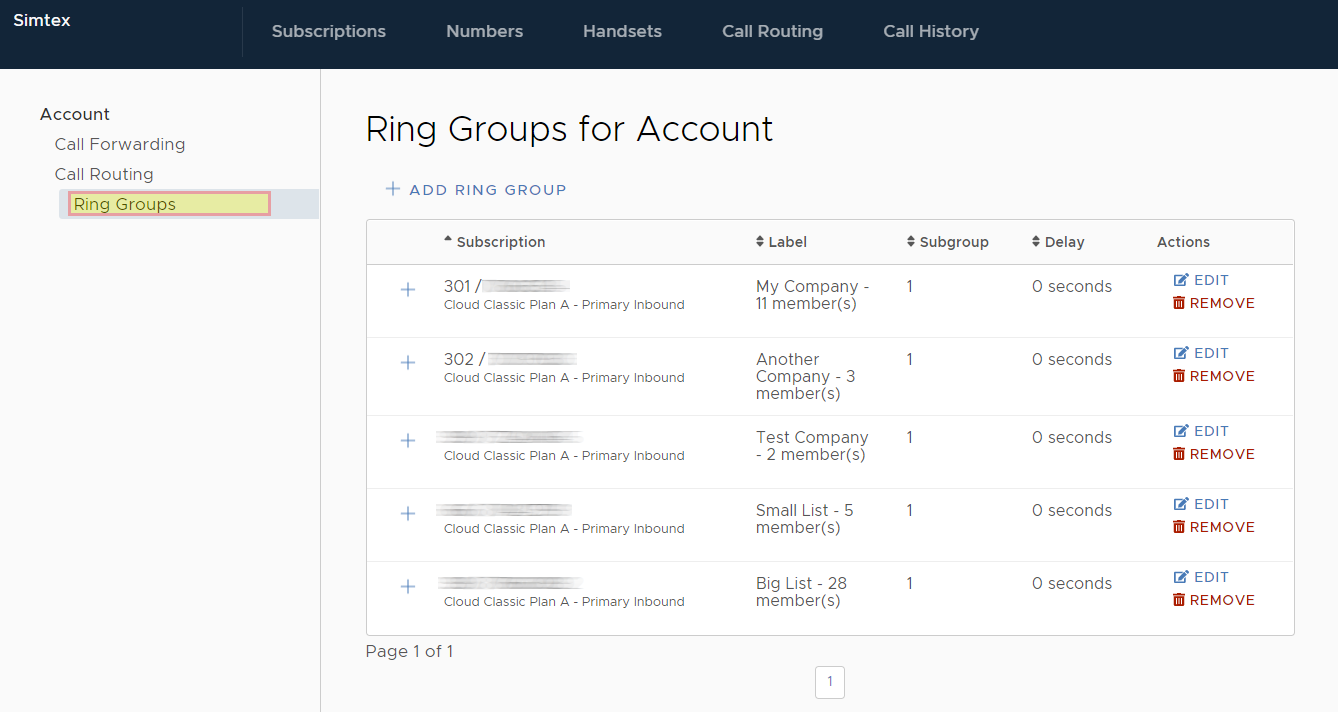
- To rename a ring group, click EDIT
- To adjust the members of a group, under Member Allocations select the required group on the left panel
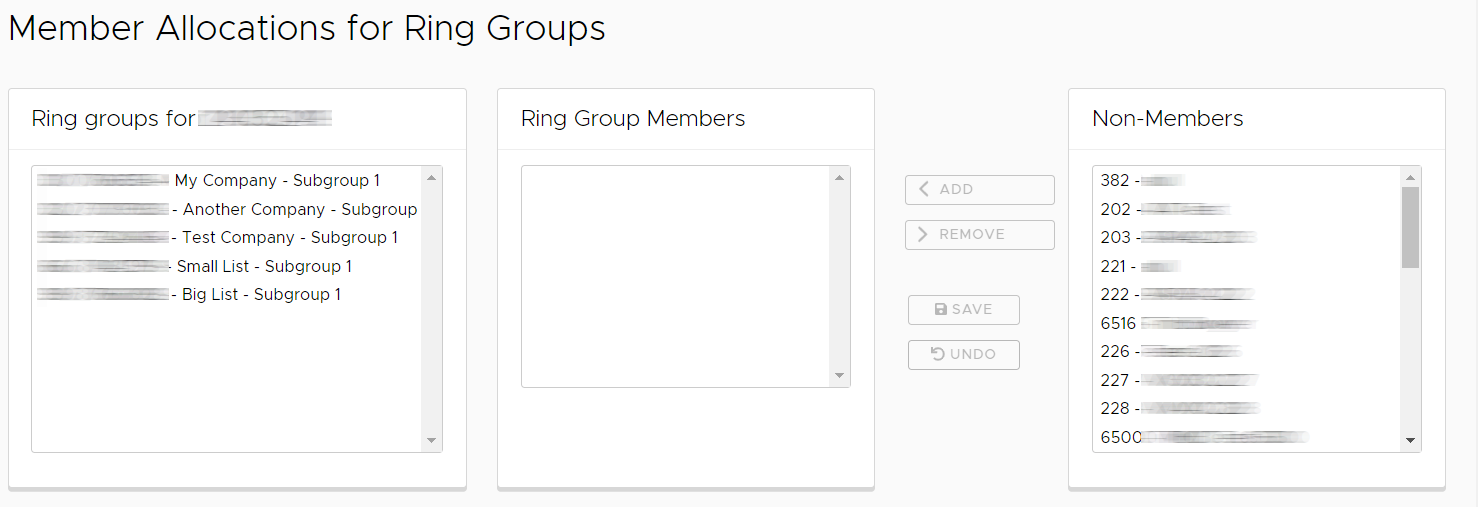
- Add and Remove members
- Click Save
Subgroups
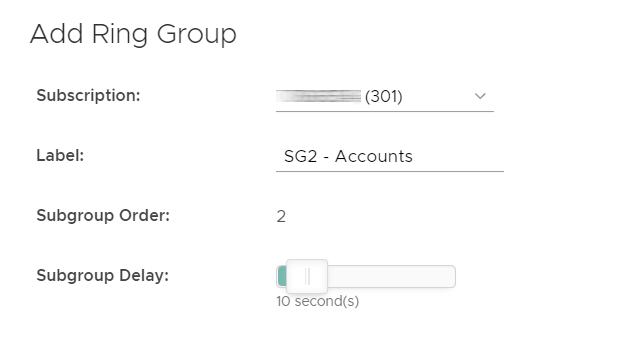
Subgroups allow you to have multiple tiered lists which are called in order. For example, you may wish to ring reception for 10 seconds before ringing reception and accounts staff.
The first group will contain reception as a member, the second subgroup will have a delay of 10 seconds and contain all the accounts staff.
- When adding a subgroup, the system will automatically increment the Subgroup Order depending on how many groups already exist
Try to give meaningful labels to your ring groups!
- Once added, find the newly created Subgroup under Member Allocations
- Select the desired ring group members to be added, click add
- Click Save
Removing Subgroups
You can only remove subgroups in reverse order – the remove button is hidden for subgroups 1 if 2 or more exist.
If you have three subgroups, remove subgroup 3, then 2.