
Cisco Manual Provisioning
Cisco devices do not support Zero Touch provisioning hence require some initial manual configuration.
Web Interface Access
-
- When the ATA has booted you will need to connect an analogue phone to either PHONE 1 or PHONE2 port on the back of the ATA
- To get the IP address of the ATA we will need to do the following:
- Pick up the handset of the analogue phone and dial ****, If you are prompted for a password enter 24726
- Next we will dial 110# and the IVR will read out the IP address of the device to you
- Within your web browser go to the IP address found in step 2.2
- Click Admin Login on the top right, type in username and password
Username: admin
Password: admin

- Click Voice on the top bar
- Click on the Provisioning tab on the left hand side
SPA112 / SPA121 ATA Series
-
- Under Profile Rule, enter the following:
http://config.mycloudvoip.com.au/$PN_$MA.bin
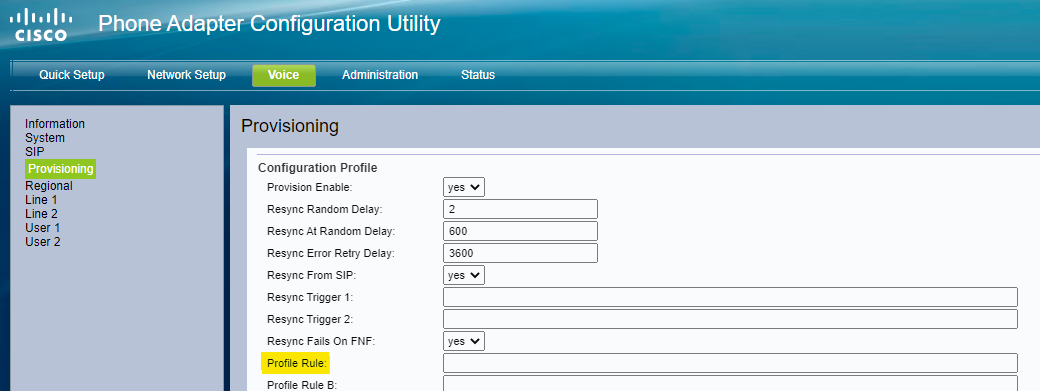
Click Submit to save changes
- When the webpage finishes saving, power cycle the ATA (disconnect power and reconnect
- You’re done! Now go ahead and test inbound and outbound calls
- Under Profile Rule, enter the following:
ATA19x Series
-
- Under Profile Rule, enter the following:
http://config.mycloudvoip.com.au/$PN_$MA.xml
- Click on Line 1 on the left hand side and then scroll down to the Subscriber Information section and enter:
· Account number in the User ID field
· SIP password for that service in the Password field.
The Account number and SIP Password information can be found within the MyCloudVoIP account portal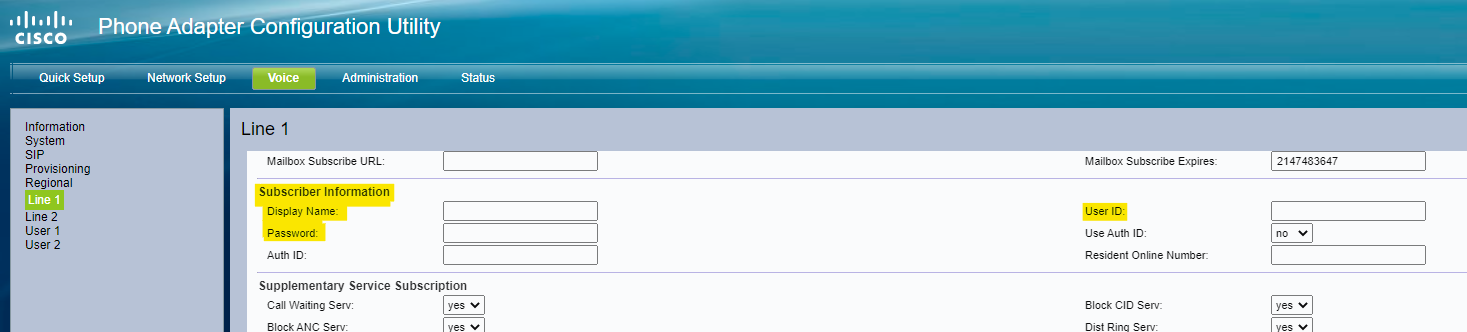
- Click Submit to save changes
- When the webpage finishes saving, power cycle the ATA (disconnect power and reconnect
- You’re done! Now go ahead and test inbound and outbound calls
- Under Profile Rule, enter the following: