FreePBX 15 is a widely used, stable and feature-rich graphical user interface for Asterisk – https://www.freepbx.org/
Our guide assumes you have already set the server up, and have the web-based GUI ready to go. If not, grab an ISO image of FreePBX14 from here: FreePBX Distro
Search for the latest ISO within “64 BIT DOWNLOADS” on the FreePBX Download page
In 99.9% of cases you do not require any ports forwarded on your router or firewall to make FreePBX talk to us.
If you are unsure, speak to us.
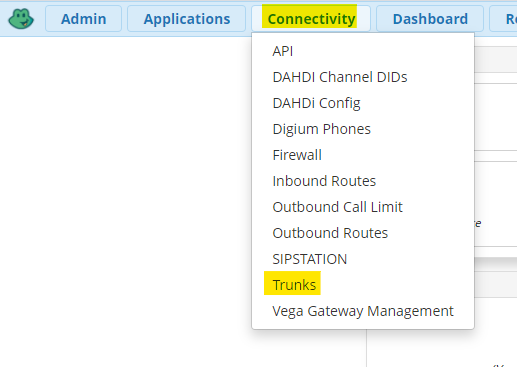
Trunk Configuration
With the release of the new SIP stack PJSIP, SIP SRV records are now supported hence there is no need to configure multiple trunks to achieve high availability. If one of our server farms is not reachable, your Asterisk server will automatically fail-over to our backup platforms.
With a variety of business grade pay-as-you-go or unlimited SIP Trunk options, we’ll have you saving money in no time. Click here for more info…
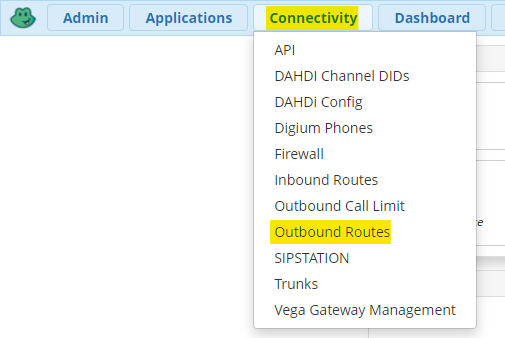
- Open Connectivity Menu, select Trunks
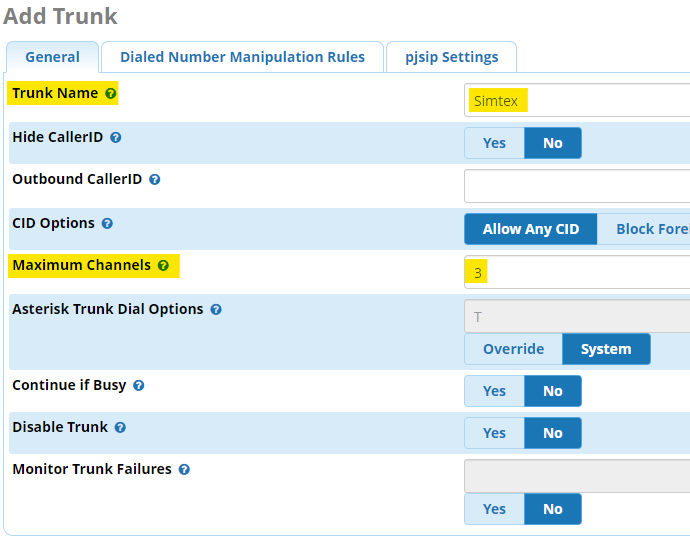
- Select SIP Trunk (chan_pjsip)

- Label your SIP Trunk, specify number of channels
- Click on PJSIP Settings tab
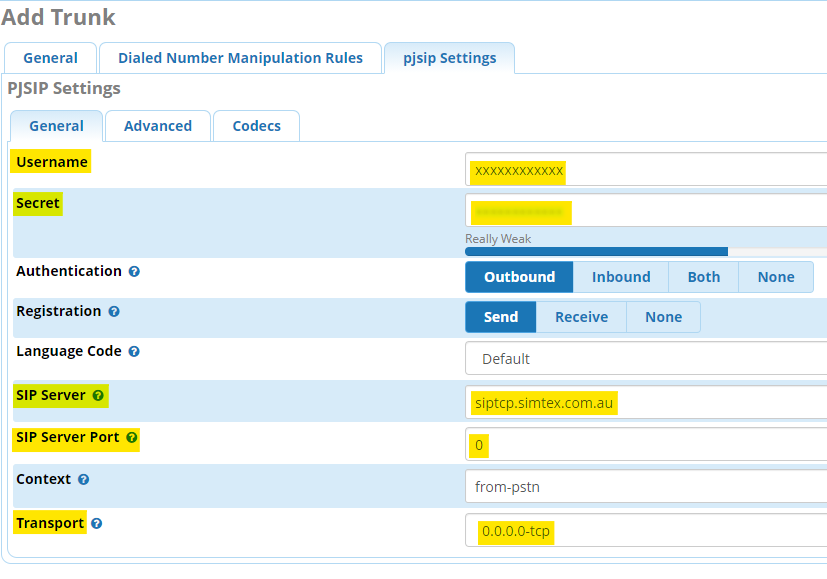
Username: 7xxxxxxx or 214xxxxxxx
Secret: xxxxxxxx
SIP Server: siptcp.simtex.com.au For West coast customers or siptcpeast.simtex.com.au For East coast customers
SIP Server Port: 0
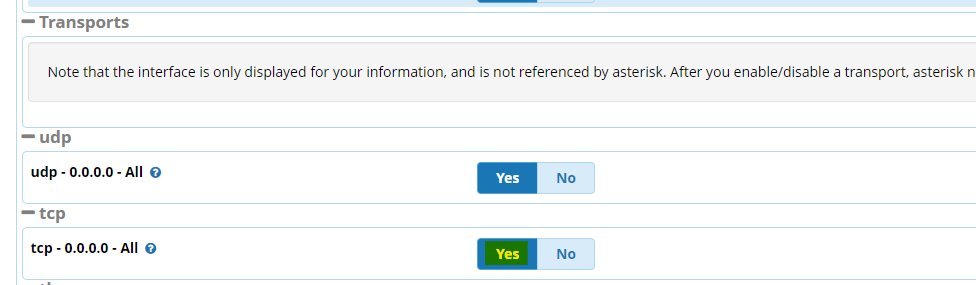
Transport: 0.0.0.0-tcp
- Go to Advanced settings tab
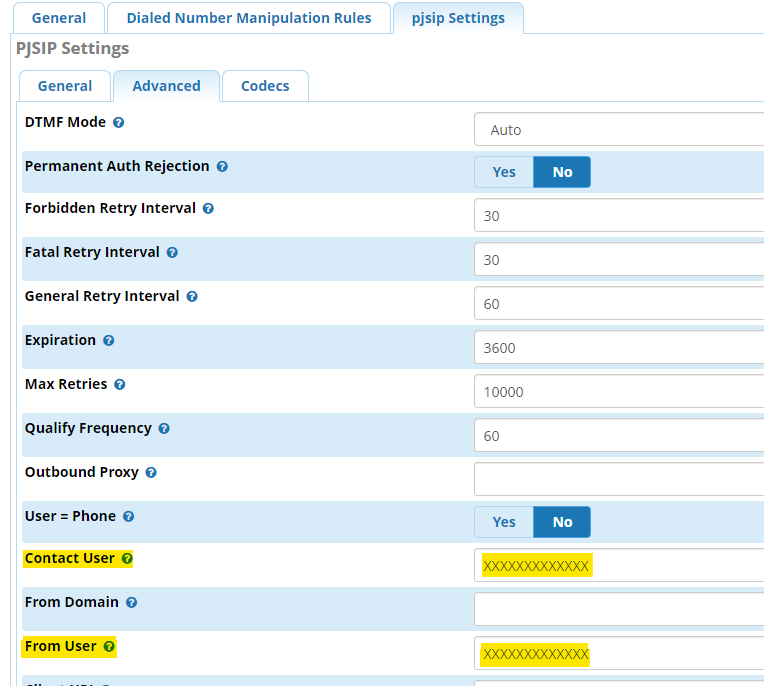

Contact User: 7xxxxxxx or 214xxxxxxx (same as username)
From User: 7xxxxxxx or 214xxxxxxx (same as username)
Trust RPID/PAI: Yes
Send RPID/PAI: Both
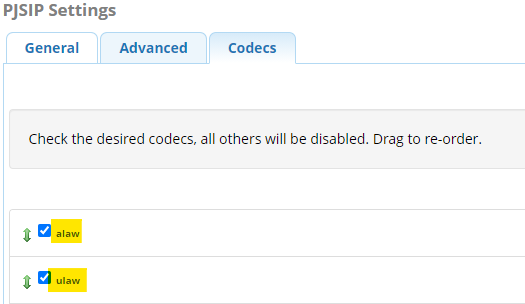
- Click on Codec settings tab
Reorder codecs to have alaw first and ulaw second
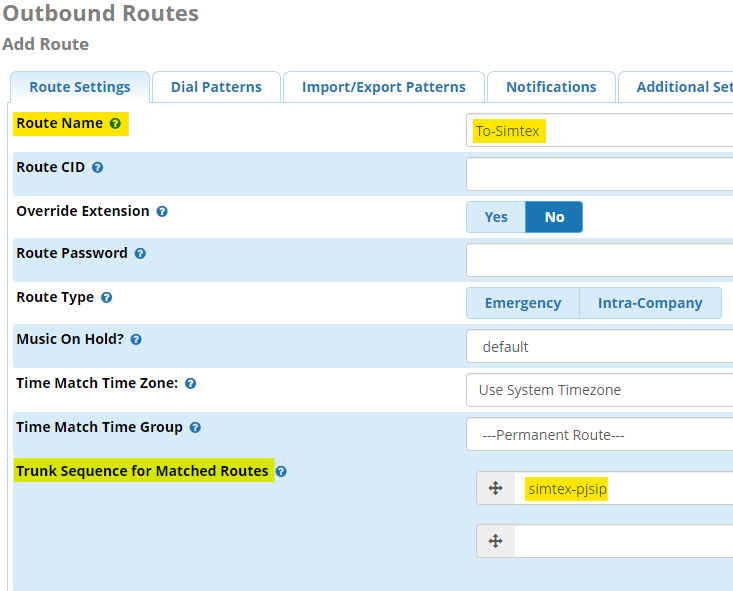
Outbound Routes
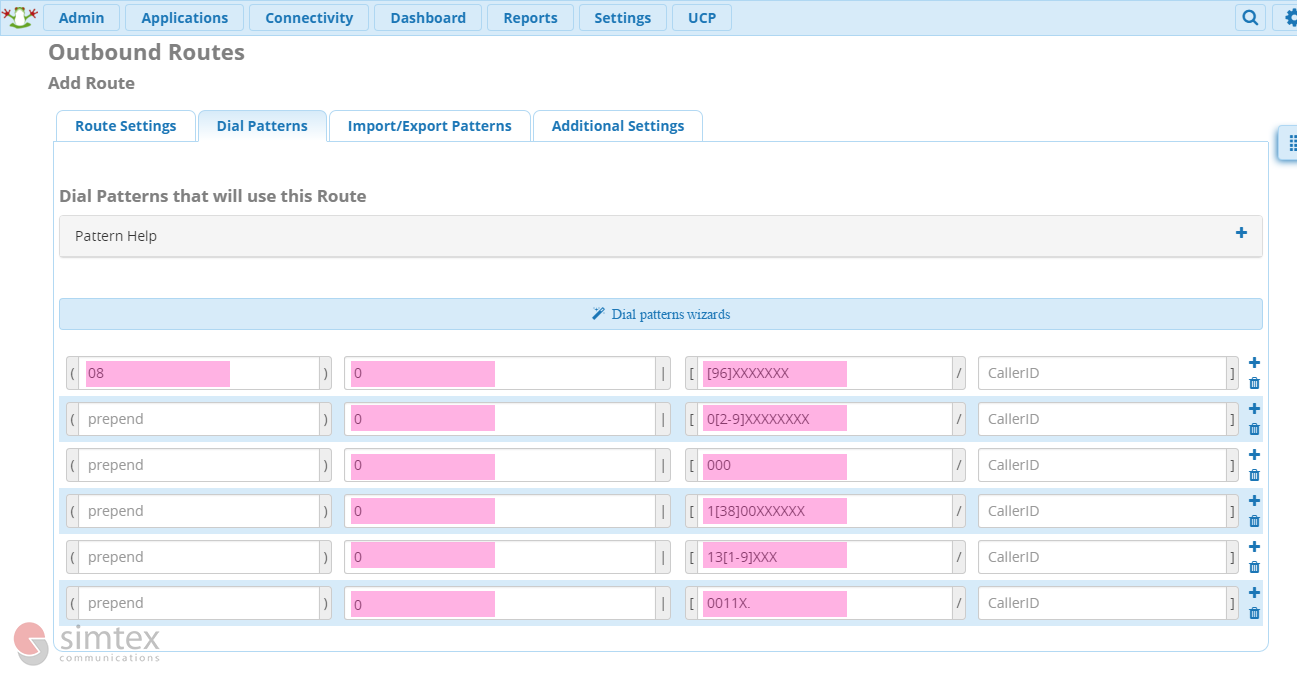
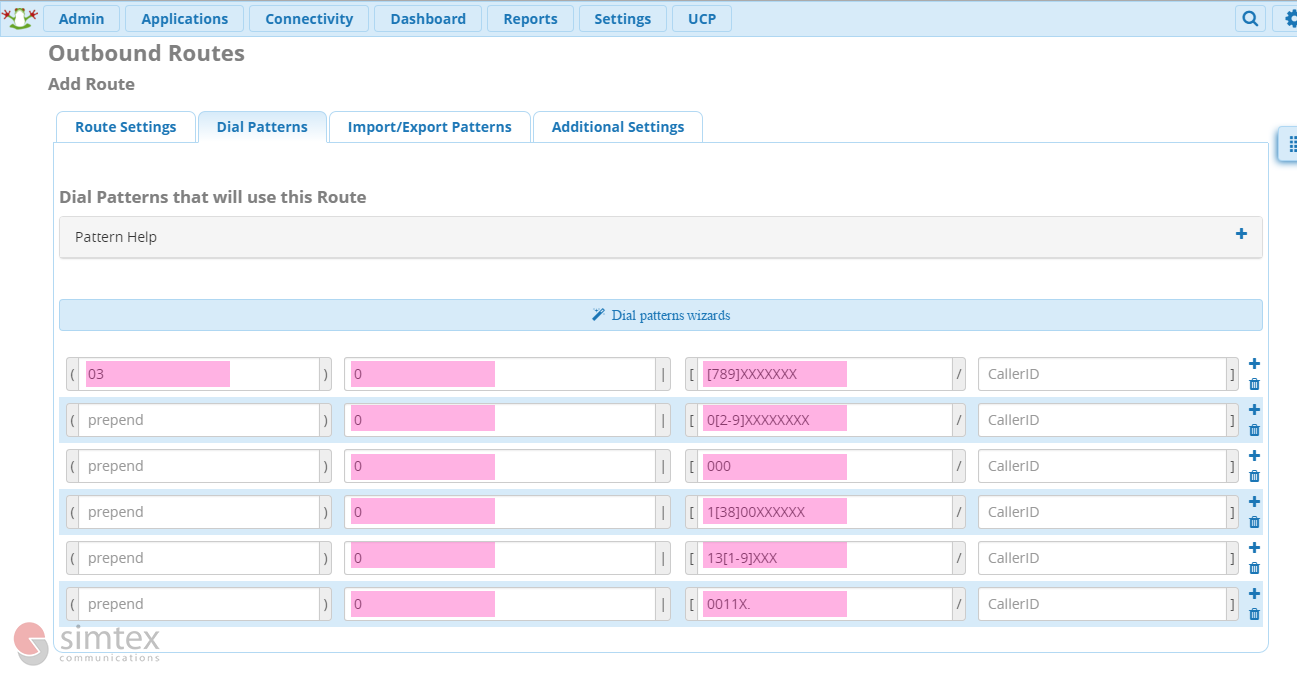
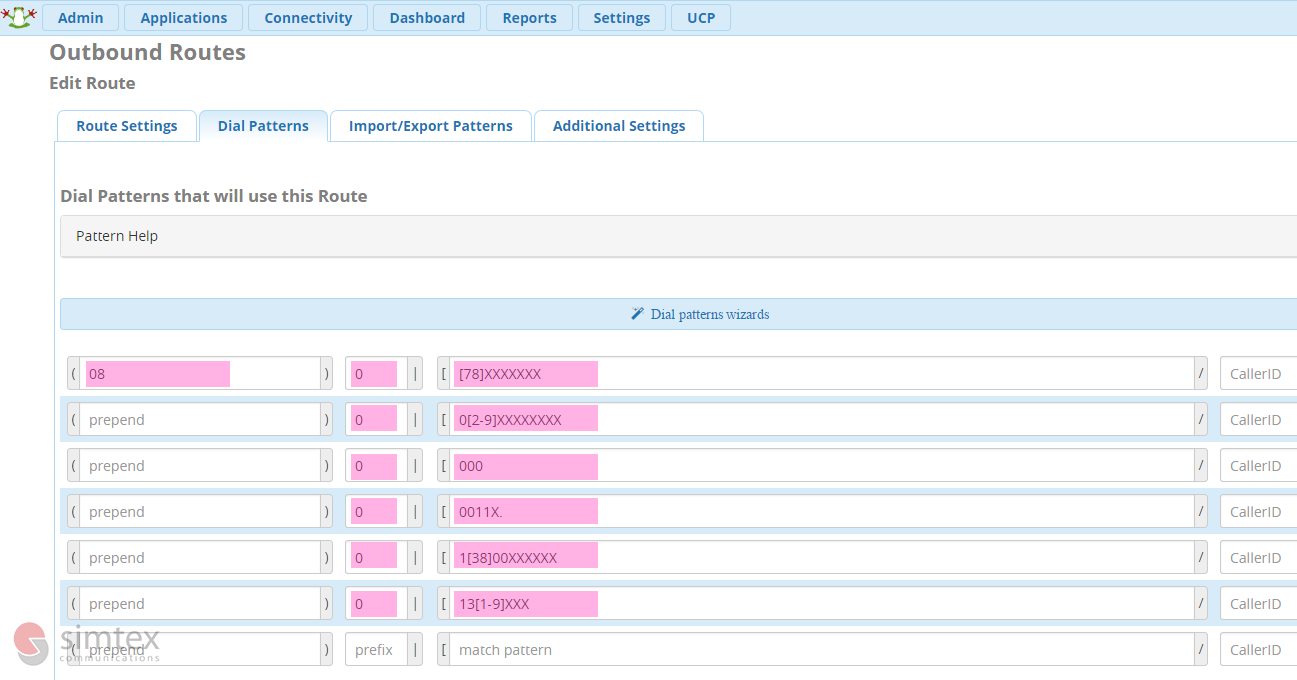
If you do not wish to make international calls, leave out the 0011 route pattern. To save yourself from grief later down the track, configure a prefix to route all external calls. In Australia, we use 0 as a standard. This will ensure internal numbers will never overlap external destinations.
- Within the Connectivity menu, select Outbound Routes and Add Outbound Route
- Label your route, and select the SIP trunk previously configured.
- Click Dial Patterns, and setup as required
The below configuration examples will accept a 0, then strip it off automatically prior to sending it to the Simtex Trunk.
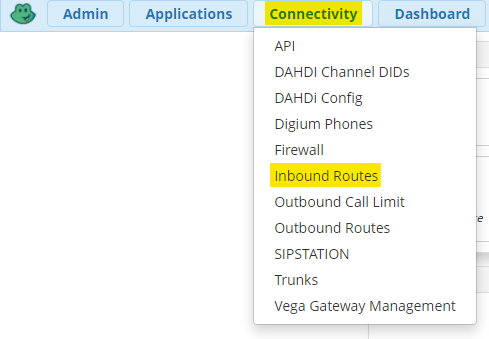
Inbound Routes
Inbound routes are used to direct incoming calls to your allocated DIDs. You can have individual numbers go to different extensions, groups, IVR routines etc as you wish.
- From the Connectivity menu, select Inbound Routes and Add Incoming Route
- Create a Catch-All route
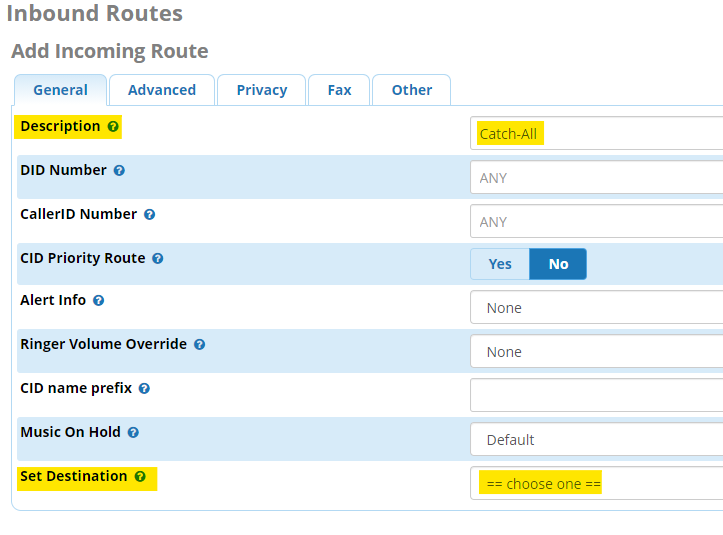
First up we will create a ‘catch-all’ inbound route. This will be answered by your PBX if a number is sent to you but not actually configured on your system. Most users will route this to a receptionist or main hunt group.
Also set the desired destination.
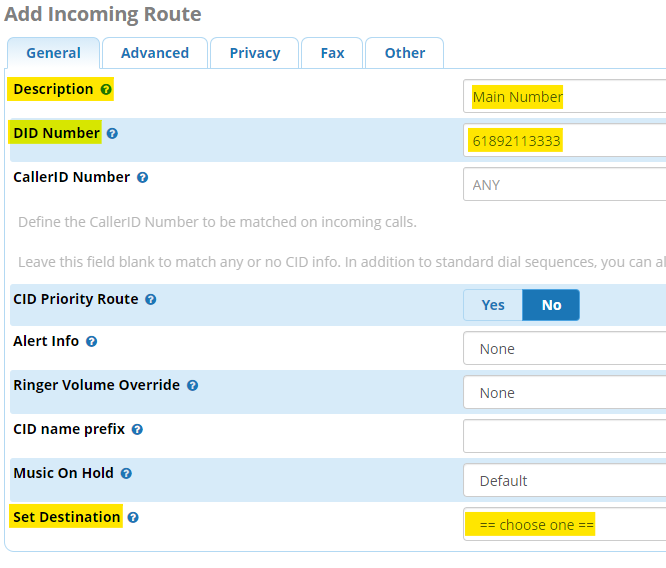
- Create and inbound route for your DID or block of DID’s
Add entries for individual numbers, or blocks of numbers. You can enter wildcard patterns such as _618921133XX
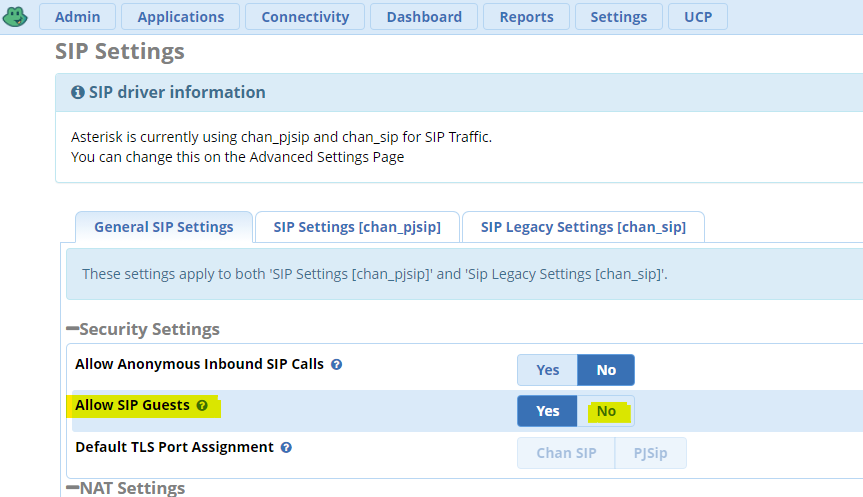
Disable SIP guest
- Go to Settings -> Asterisk SIP settings then under the General SIP Settings you will find the Allow SIP Guests. Select No for this option.