Fusion PBX SIP Trunk Configuration Guide
Simtex SIP Trunks from $4.99/month
Business-grade SIP trunking with geo-redundant infrastructure, crystal-clear audio, and Australian-based support. Pay-as-you-go or unlimited plans available.
Overview
This is a step-by-step guide to configuring a Simtex SIP trunk with FusionPBX. FusionPBX is a full-featured, multi-tenant PBX platform built on FreeSWITCH.
This guide assumes you already have FusionPBX installed with the web GUI accessible. If not, grab the installer from fusionpbx.com.
What you'll need
- Your Simtex account number (e.g.
214XXXXXXX) - Your Simtex SIP password
- Your allocated DIDs
- FusionPBX platform installed and running
- West Coast (AU):
siptcp.simtex.com.au - East Coast (AU):
siptcpeast.simtex.com.au
Choose the server closest to your location. FreeSWITCH fully supports SRV record resolution — if one of our server farms is unreachable, your FusionPBX will automatically failover to our backup platforms.
Step 1 — SIP Profile Configuration
First, we need to configure your public IP within FusionPBX so it can communicate with our servers.
- Navigate to Advanced → Variables
- Find the IP Address section
- Enter your public-facing IP address for both signalling and media
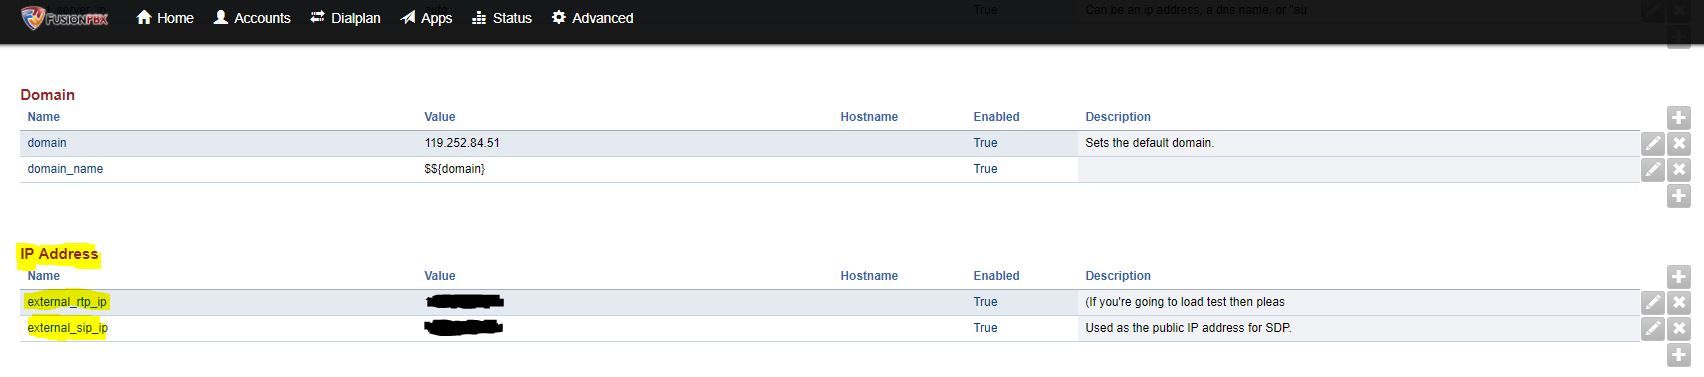
By default, gateways use the External SIP profile on port 5080. You don't need to change this, but keep it in mind for firewall rules. To change the port, find the external_sip_port variable on the same page.
Step 2 — Gateway Configuration
FreeSWITCH supports SRV record resolution natively, so you can simply use the domain name without specifying a port — it will automatically discover our server infrastructure.
Create a new gateway with the following settings:
SIP Server:   siptcp.simtex.com.au
Username:     214XXXXXXX
Password:     XXXXXXXX
From User:    214XXXXXXX (same as username)
From Domain:  XXX.XXX.XXX.XXX (your public IP)
Realm:        siptcp.simtex.com.au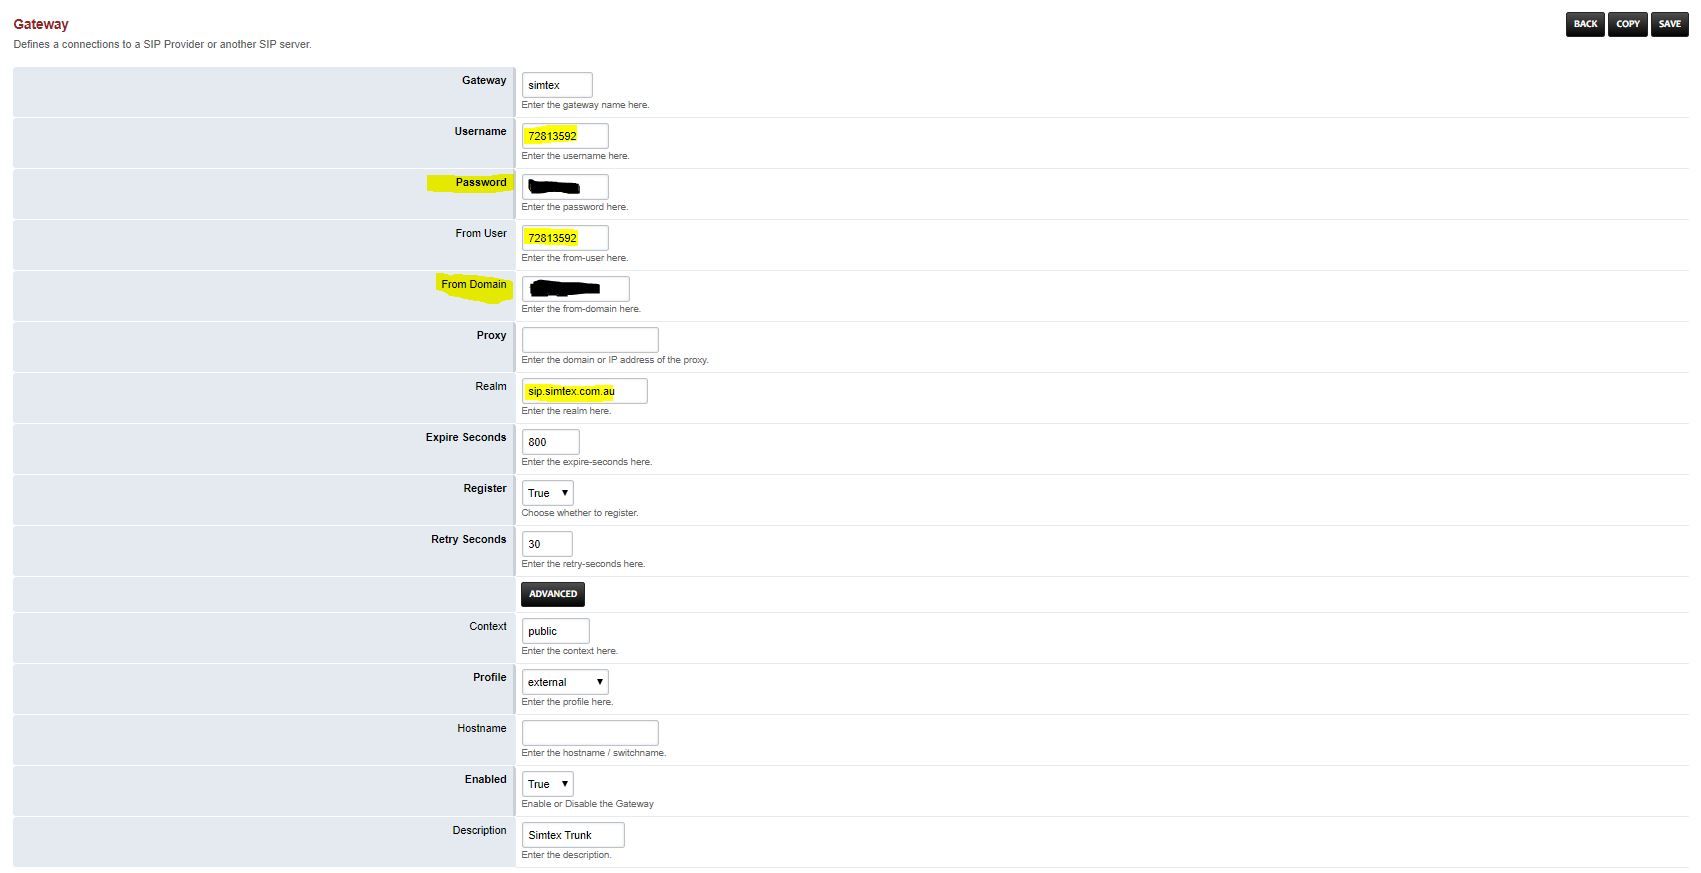
siptcp.simtex.com.au with siptcpeast.simtex.com.au in the SIP Server and Realm fields if your server is located on the East Coast of Australia.Advanced Settings
Open the Advanced section and configure:
Distinct To:             True
Auth Username:           214XXXXXXX (same as username)
Extension:               214XXXXXXX (same as username)
Register Transport:      tcp
Caller ID in From:       True
SIP CID Type:            rpid
Extension In Contact:    True
Channels:                (your purchased inbound channel count)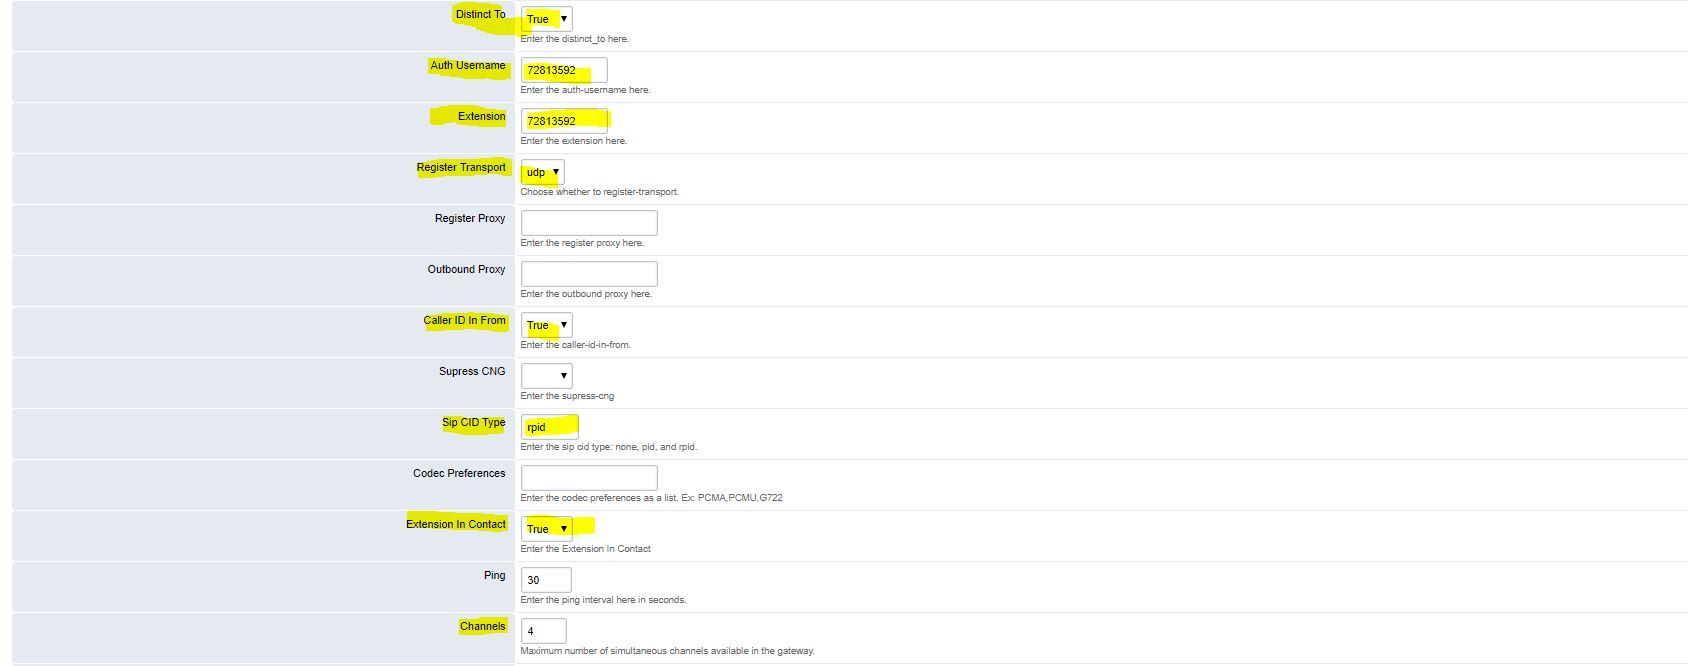
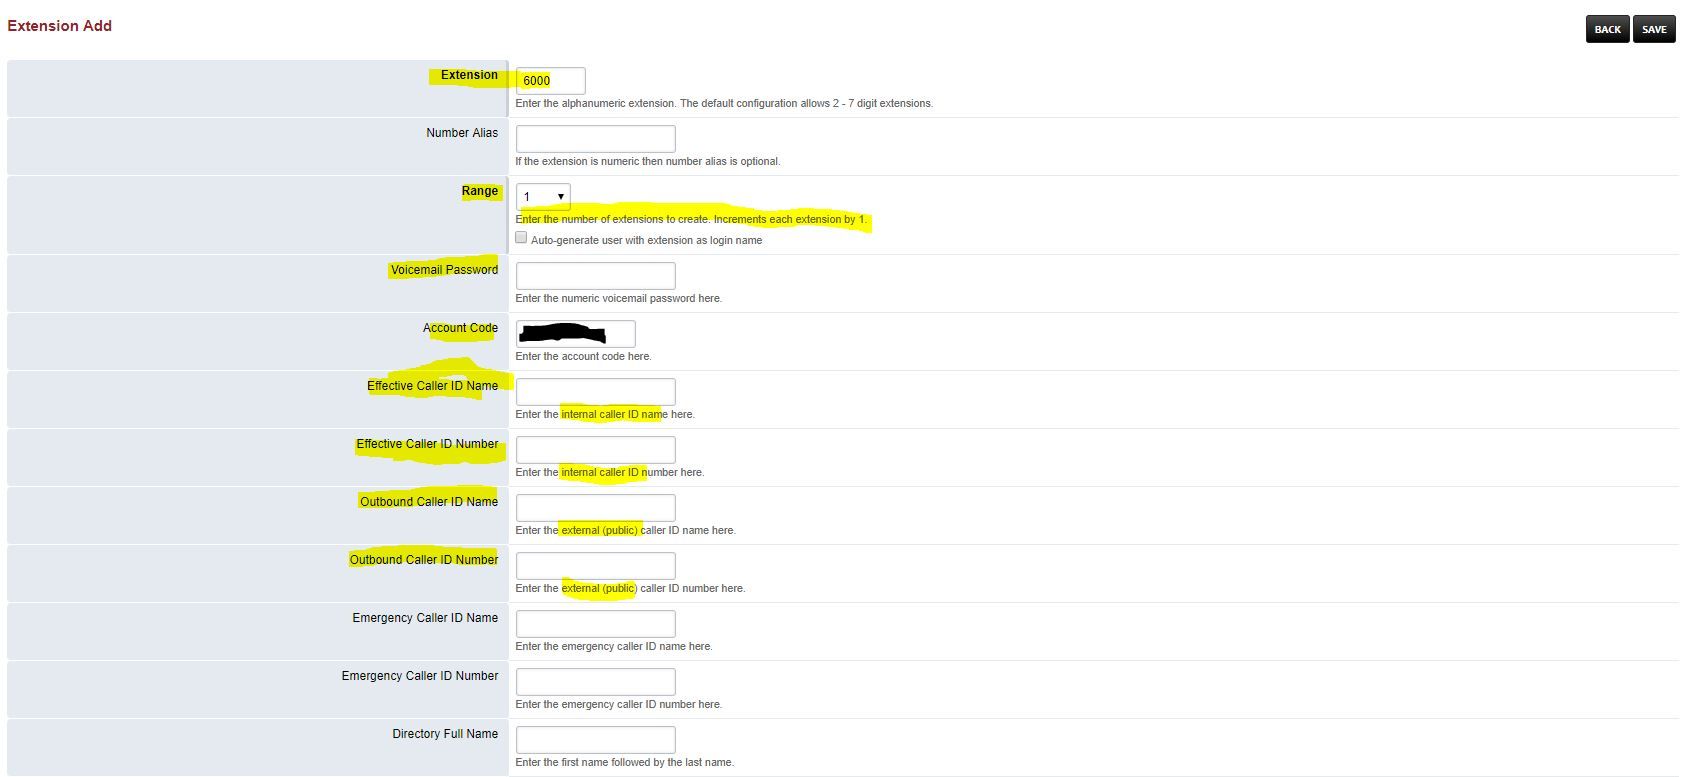
Step 3 — Extension Configuration
To add extensions, go to Accounts → Extensions. Use the Range option to create multiple extensions at once — just enter the first extension number.
Values to configure for each extension:
- Extension number
- Effective Caller ID Name and Number
- Outbound Caller ID Name and Number
The voicemail password will auto-generate if not specified. Extension passwords are shown once created.
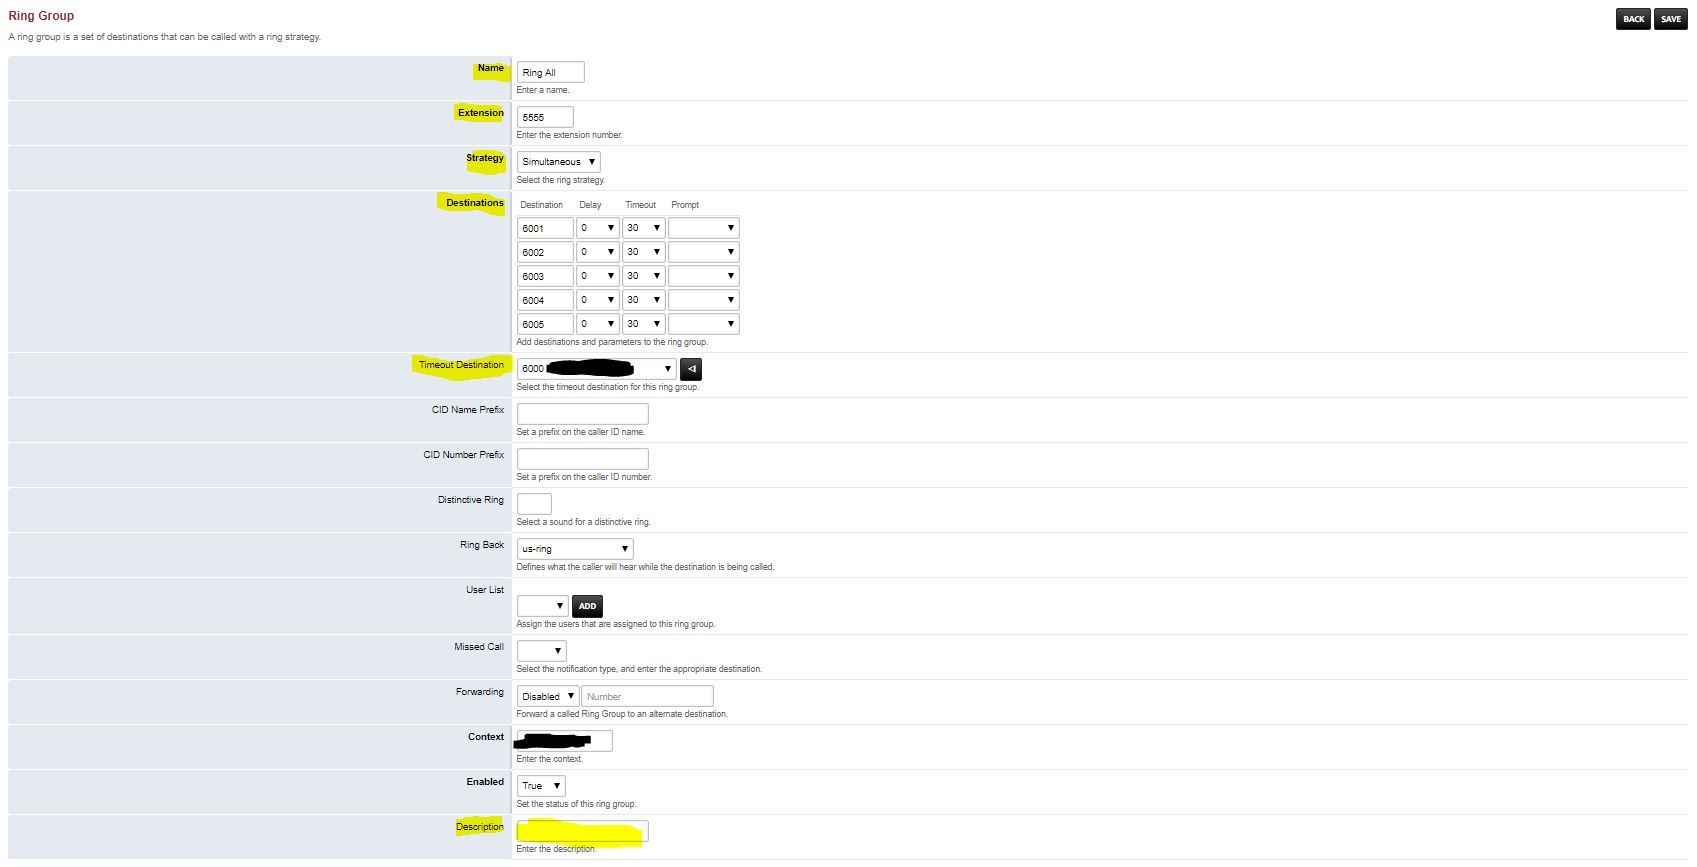
Step 4 — Ring Group Setup
With extensions configured, set up a Ring Group for inbound calls.
Configure the following:
- Name — a descriptive label
- Extension — the ring group number
- Strategy — how calls are distributed (simultaneous, sequential, etc.)
- Destinations — which extensions to ring
- Timeout Destination — where unanswered calls go
Step 5 — Destination (Inbound Routes) Setup
Navigate to Dialplan → Destinations and click the + icon to add a new destination.

Configure the following:
- Destination — the DID number
- Actions — select your previously created Ring Group
- Domain — use the default in most cases
- Enabled — set to true
- Description — a meaningful label
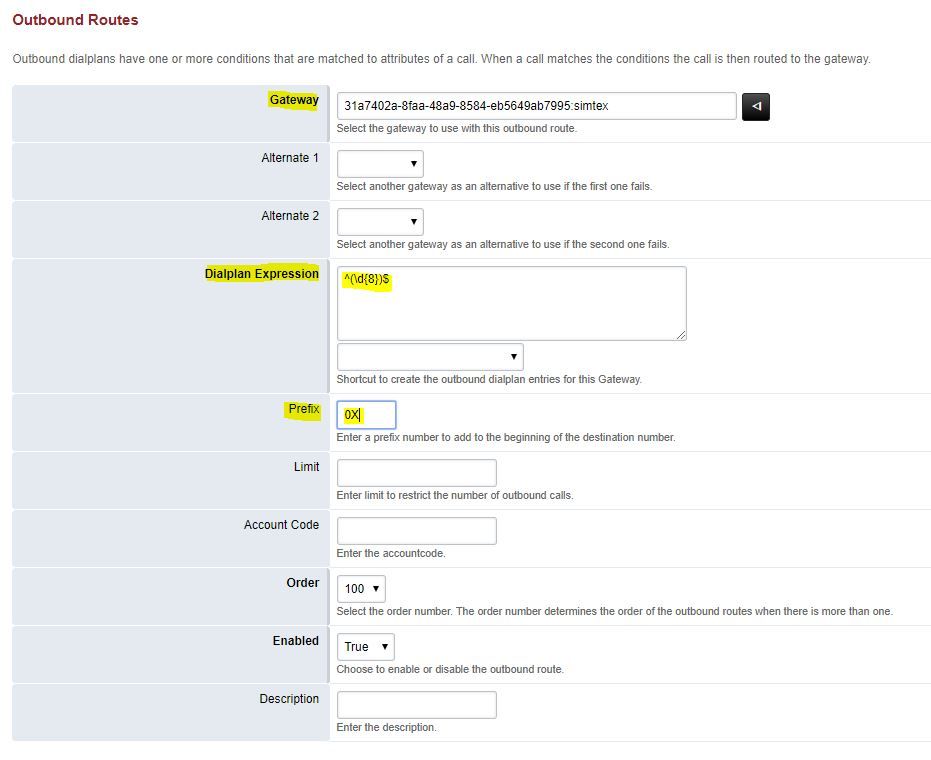
Step 6 — Outbound Route Setup
FusionPBX uses regular expressions to match dialled numbers and route them to the correct trunk. Configure the following dial patterns for Australian numbering:
Australian Dial Patterns
| Type of Number | Regular Expression | Example |
|---|---|---|
| Local (with area code) | ^(\d{8})$ | 94883344 |
| Interstate (with area code) | ^(0[2-9]\d{8})$ | 0894883344 |
| Emergency | ^(000)$ | 000 |
| 1300/1800 Numbers | ^(1[38]00\d{6})$ | 1300888519 |
| 13 Numbers | ^(13[1-9]\d{3})$ | 131313 |
| International | ^(0011\d{1,15})$ | 00116189488334 |