🚀 Getting Started

1. Introduction
Welcome to IVR-Designer—the ultimate drag-and-drop tool for building automated call flows (a.k.a. IVRs). Picture it like you’re wiring a series of rooms in a house: each room is a node with a specific function (like playing a menu prompt or switching based on time), and the wires between them represent the path calls take.
In this guide, we’ll walk you through:
Basic concepts: The canvas, nodes, wires.
Usage overview: How to add nodes, connect them, and configure settings.
Node types: A deep dive into each node, from your Call Start node to advanced ones like Date/Time and What-If nodes.
We’ll keep it friendly, but let’s not forget we’re here to get serious work done, too!
2. Getting Started
Note
You are free to work and edit your IVR before changing the CallDirector Routing; without IVR-Designer selected, calls will not be impacted.
2.1 Launching the IVR-Designer
IVR Designer can be used with any CallDirector account / subscription.
Open the IVR-Designer in your web browser, navigate to http://account.mycloudvoip.com.au
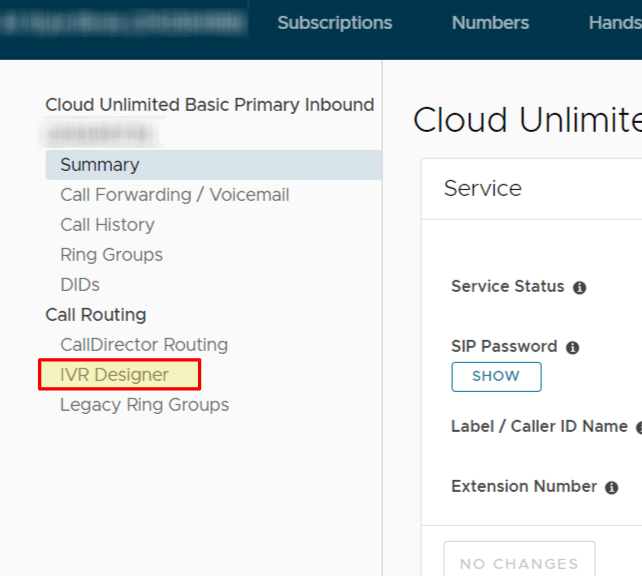
Find the CallDirector or Primary Inbound account you which to work with.
Click IVR Designer on the left
You’ll be greeted by a canvas—a large, open area where you’ll assemble your call flow using nodes and wires.
2.2 The Canvas
Drag-and-Drop: On the left or top (depending on your design), you’ll see a palette of node types. Click or drag one onto the main canvas.
Wires: Each node has one or more connectors on its sides (often on the right). These connectors, or handles, let you wire one node to another.
Zoom: Use your mouse scroll wheel or pinch gestures to zoom in/out. (Because, let’s face it, sometimes you need a close look at your brilliant call flow.)
Panning: Click and drag on empty canvas space to pan around—like moving a camera in your call flow world.
2.3 Basic Flow Example
Place a “Call Start” node on the canvas. This is where calls enter your flow.
Place a “Menu” node to let callers press digits for different options.
Wire the “Call Start” node to the “Menu” node.
Double-click or otherwise open the node to configure its settings (like the audio prompt).
Continue adding new nodes (e.g., “Ring Group,” “DateTime Switch”) and wiring them together until your flow is complete.
2.4 CallDirector Routing
Your CallDirector subscription can be setup in three different ways:
Legacy Ring Groups (default)
Custom Script (only if we have custom-coded an IVR for you)
IVR Designer
To adjust the route your inbound calls take:
Tap CallDirector Routing on the left
Tap IVR Designer
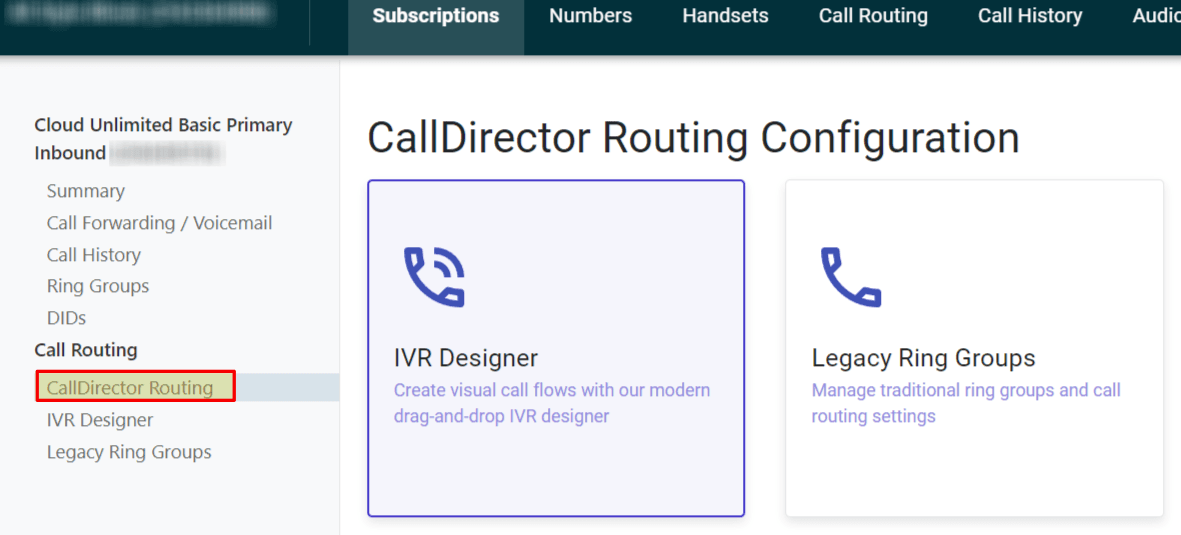
Note: Changes take place immediately
That’s it—you’ve built a simple IVR flow. Next, we’ll explore the specific nodes in detail.
3. Overview of Nodes and Wires
3.1 What is a Node?
A node is a building block in your call flow. Examples:
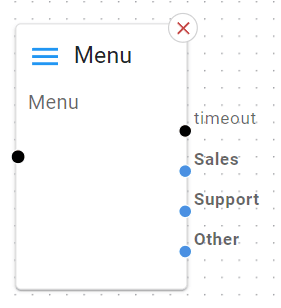
Menu (caller selects 1 for Sales, 2 for Support, etc.)
Date & Time Switch (decide call routing based on time of day or holidays)
Ring Group (ring multiple extensions simultaneously or in sequence)
Queue (place callers in line for the next available agent)
…and more.
3.2 Wiring Nodes
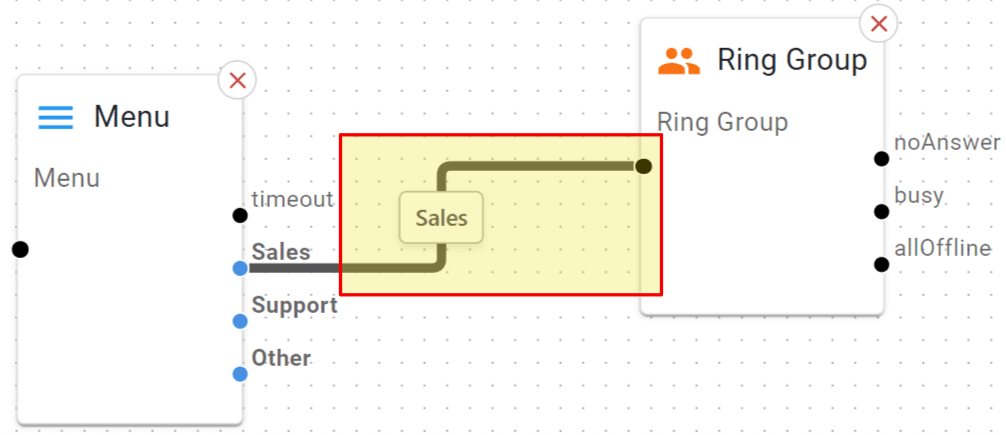
Each node can have one or more outgoing wires. When you drag a wire from a node’s connector (handle) and drop it onto another node, you’re defining the path the call will take. For instance:
If a Menu node times out (no selection made), you might wire that outcome to “Voicemail.”
If a Date & Time Switch detects it’s “after hours,” you might wire that to “Voicemail” or “Closed Greeting.”
Tip
If your wires look messy, feel free to rearrange nodes around the canvas. Wires will stay connected.
3.3 Node Configuration
Each node on the canvas, has its own configuration screen - this is where you will adjust parameters, twiddle knobs and push levers.
Opening the Configuration Form
Click on a node on the canvas.
An Edit Node screen appears.
Common Fields & Parameters
Many node types share similar field properties:
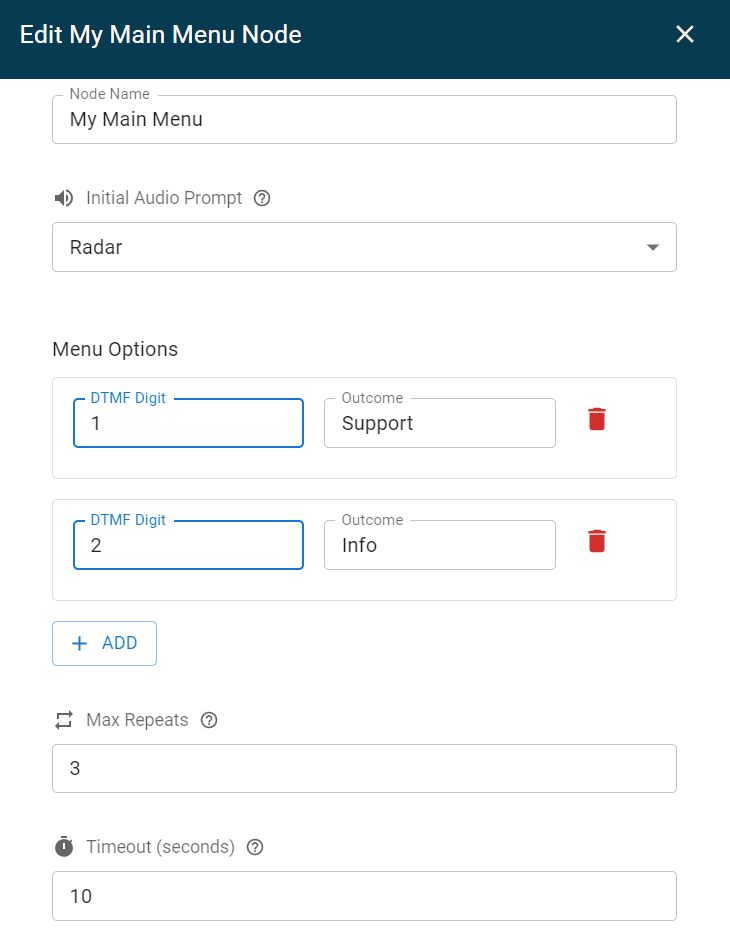
Label: A short description you can customise to help you understand the node’s purpose - example “After-hours support menu”, or “Reception Voicemail”.
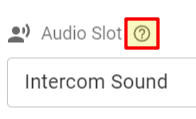
Tooltip: Additional help text is available - just tap the question mark:
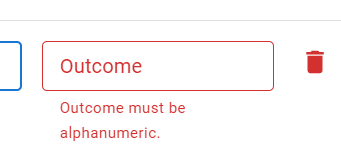
Validation & Required Fields
Certain fields must be filled in
If a field is invalid, you’ll see a red border or an error message below the field. Fix these errors before saving.
Saving Configuration Changes
Click Save Changes:

If you wish to revert or cancel any changes made within the node, just close the node window.
3.4 Deleting Nodes
Select the node (click on it), then press
Deleteor use the on-screen ❌ icon.You will lose all connections to and from that node.